Azure Blob Lifecycle Management Part 3: Create Azure Function to Automatically Set Blob Index Tag
- George Lin

- Oct 30, 2021
- 6 min read
Updated: Dec 3, 2021
GitHub Repo (currently private, available upon request):
https://github.com/glindba/Add-Blob-Index-Tag-With-Azure-Function.git
1. From the Visual Studio menu, select File > New > Project.
2. In Create a new project, select C# from “All language” dropdown list, also select “Azure” as platform .choose the Azure Functions template, and then select Next.
3. In Configure your new project, enter a Project name for your project, for example, “AzureBlobIndexTags” and then select Create. The function app name must be valid as a C# namespace, so don’t use underscores, hyphens, or any other nonalphanumeric characters.
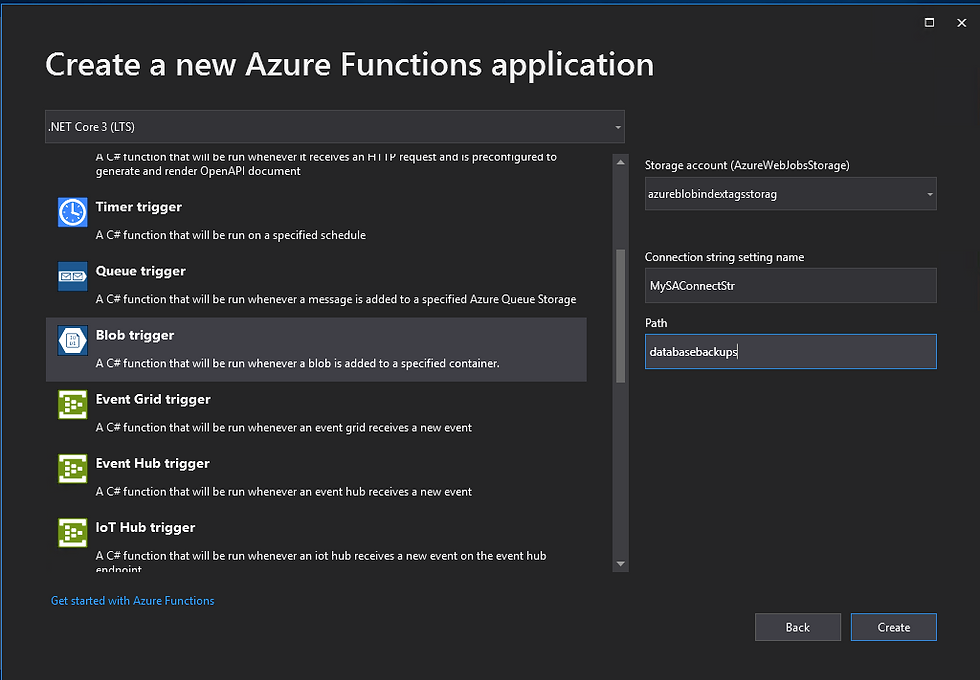
4. For the Create a new Azure Functions application settings, use the values in the following table:
SETTING | VALUE | DESCRIPTION |
.NET version | .NET Core 3 (LTS) | This value creates a function project that runs in-process with version 3.x of the Azure Functions runtime. |
Function template | Blob trigger | This value creates a function triggered whenever a blob is added to a specifiied container. |
Storage account (AzureWebJobsStorage) | Browse | Because a function app in Azure requires a storage account, one is assigned or created when you publish your project to Azure. A blob trigger does use an Azure Storage account connection string |
5. Once you select “Browse” from the “Storage account” dropdown list, A new popup windows asks you to sign in Azure:
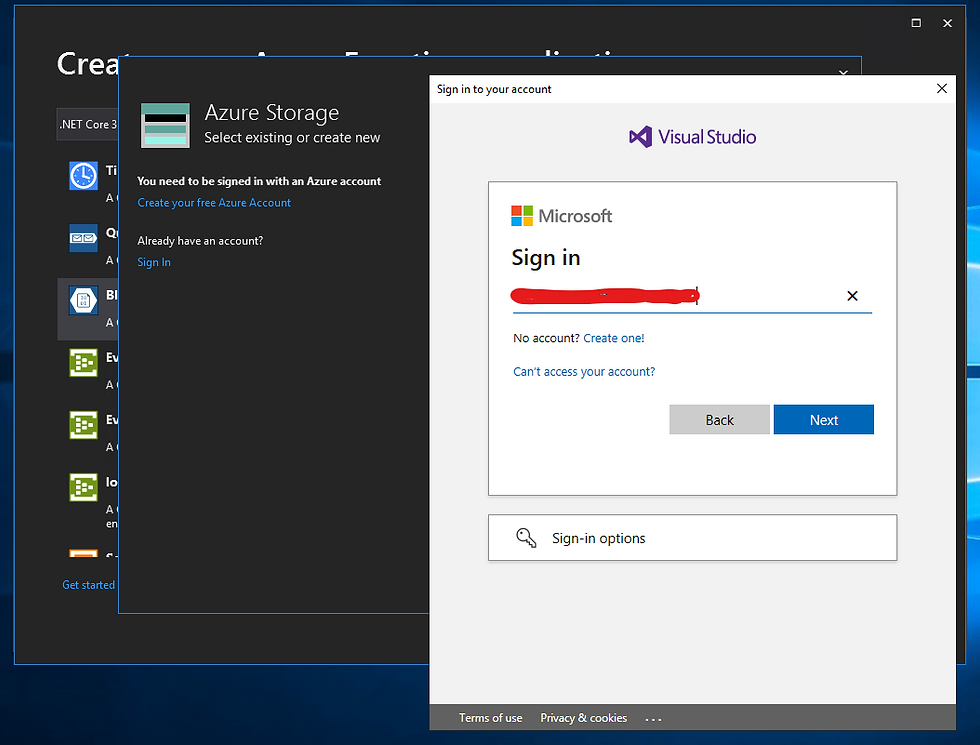
6. After signing in Azure, in the next popup window, select the subscription and storage account you want to use with this function. Here you can also create a new storage account (recommended)
Note: Blob tags are only supported on General Purpose v2 storage accounts.
7. Still in Create a new Azure Functions application, after select/create the storage account, for example, azureblobindextagsstorag, provide a name to Connection string name. The Path is the Azure function’s target container name, for example, databasebackups. click Create to continue
8. Visual Studio 2019 automatically creates a function named Function1.cs and shows its content
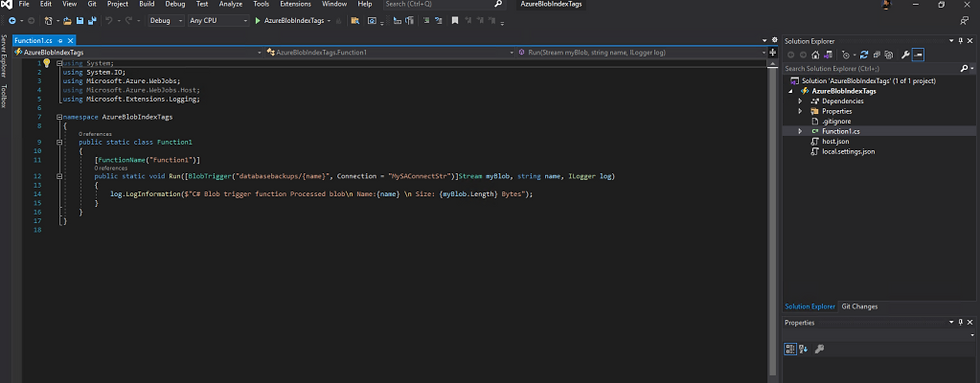
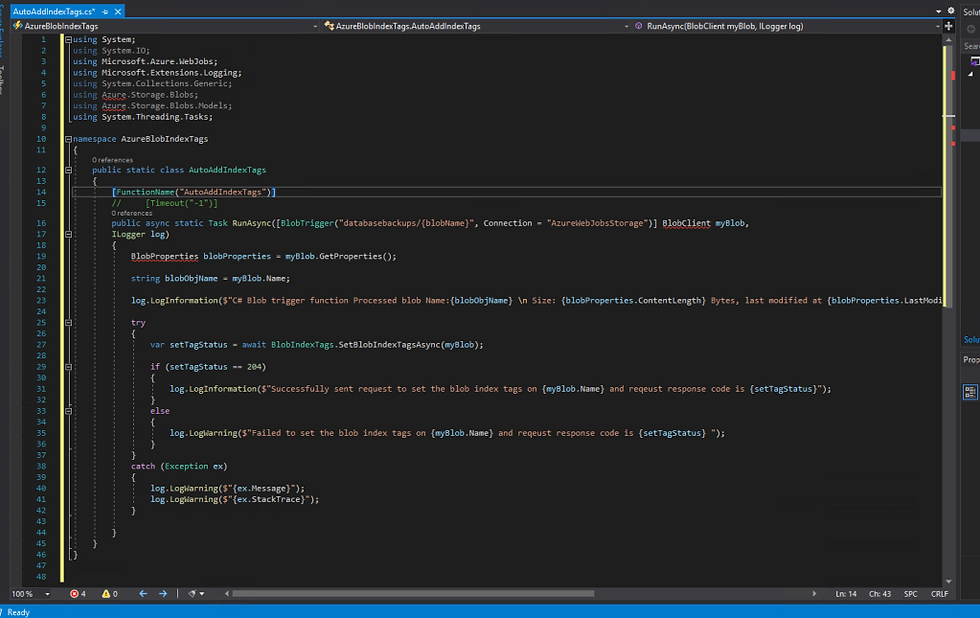
9. Copy the C# code block below and paste it in Funcation1.cs to replace all the existing code lines: Rename Function1.cs to AutoAddIndexTags.cs
using System;
using System.IO;
using Microsoft.Azure.WebJobs;
using Microsoft.Extensions.Logging;
using System.Collections.Generic;
using Azure.Storage.Blobs;
using Azure.Storage.Blobs.Models;
using System.Threading.Tasks;

namespace SaaSOps.DPA.BlobManagement
{
    public static class AutoAddIndexTags
    {
        [FunctionName("AutoAddIndexTags")]
        //     [Timeout("-1")]
        public async static Task RunAsync([BlobTrigger("databasebackups/{blobName}", Connection = "AzureWebJobsStorage")] BlobClient myBlob,
        ILogger log)
        {
            BlobProperties blobProperties = myBlob.GetProperties();

            string blobObjName = myBlob.Name;

            log.LogInformation($"C# Blob trigger function Processed blob Name:{blobObjName} \n Size: {blobProperties.ContentLength} Bytes, last modified at {blobProperties.LastModified}, the day number of year is {blobProperties.LastModified.DayOfYear}\n");

            try
            {
                var setTagStatus = await BlobIndexTags.SetBlobIndexTagsAsync(myBlob);

                if (setTagStatus == 204)
                {
                    log.LogInformation($"Successfully sent request to set the blob index tags on {myBlob.Name} and reqeust response code is {setTagStatus}");
                }
                else
                {
                    log.LogWarning($"Failed to set the blob index tags on {myBlob.Name} and reqeust response code is {setTagStatus} ");
                }
            }
            catch (Exception ex)
            {
                log.LogWarning($"{ex.Message}");
                log.LogWarning($"{ex.StackTrace}");
            }
        }
    }
}
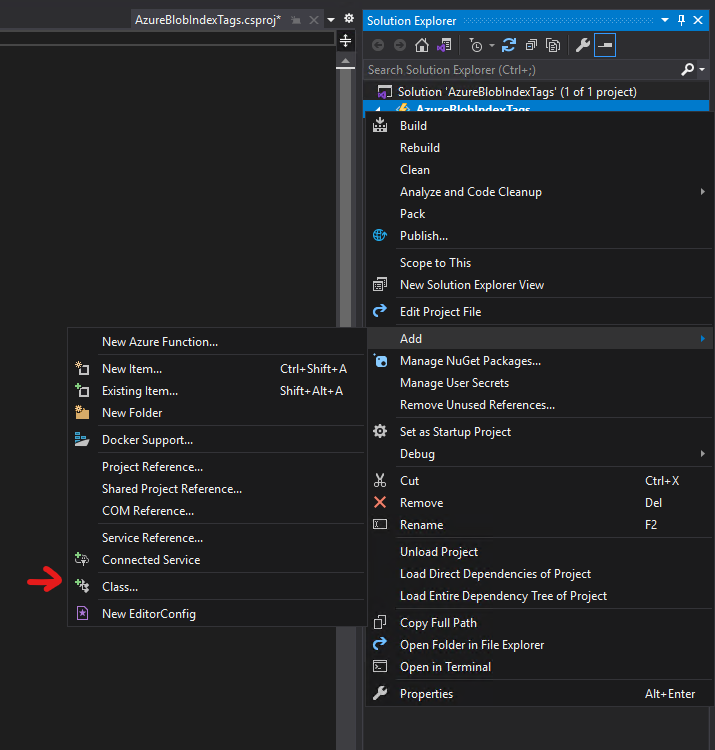
10.In Solution Explorer, right click on the project name AzureBlobIndexTags, then Add->Class
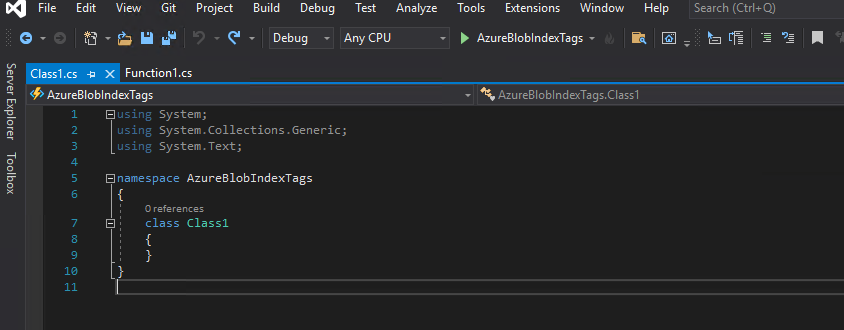
11. Visual Studio automatically create a new class named Class1.cs
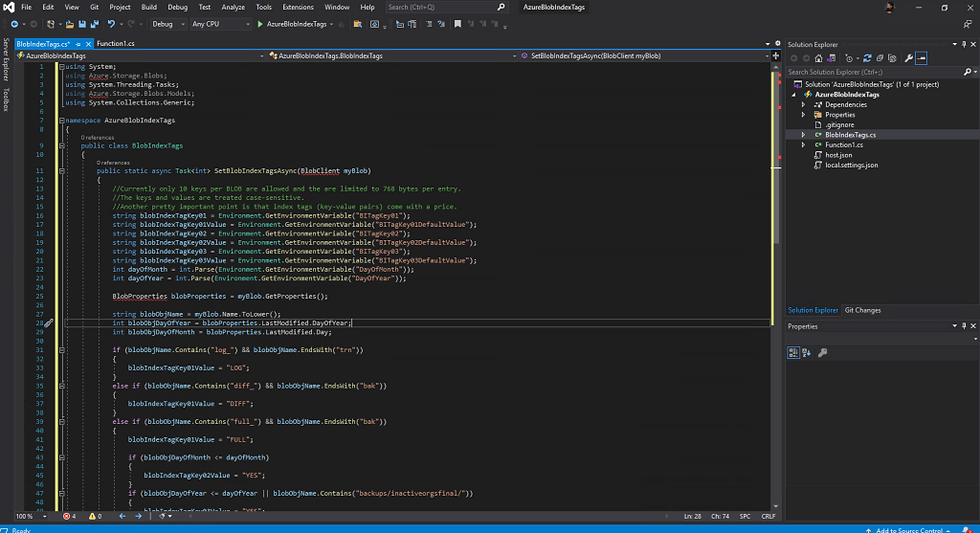
12. Copy the following code block and paste it in Class1.cs to replace all the existing code lines. Rename Class1.cs to BlobIndexTags.cs
using System;
using Azure.Storage.Blobs;
using System.Threading.Tasks;
using Azure.Storage.Blobs.Models;
using System.Collections.Generic;

namespace AzureBlobIndexTags
{
    public class BlobIndexTags
    {
        public static async Task<int> SetBlobIndexTagsAsync(BlobClient myBlob)
        {
            //Currently only 10 keys per BLOB are allowed and the are limited to 768 bytes per entry.
            //The keys and values are treated case-sensitive.
            //Another pretty important point is that index tags (key-value pairs) come with a price.
            string blobIndexTagKey01 = Environment.GetEnvironmentVariable("BITagKey01");
            string blobIndexTagKey01Value = Environment.GetEnvironmentVariable("BITagKey01DefaultValue");
            string blobIndexTagKey02 = Environment.GetEnvironmentVariable("BITagKey02");
            string blobIndexTagKey02Value = Environment.GetEnvironmentVariable("BITagKey02DefaultValue");
            string blobIndexTagKey03 = Environment.GetEnvironmentVariable("BITagKey03");
            string blobIndexTagKey03Value = Environment.GetEnvironmentVariable("BITagKey03DefaultValue");
            int dayOfMonth = int.Parse(Environment.GetEnvironmentVariable("DayOfMonth"));
            int dayOfYear = int.Parse(Environment.GetEnvironmentVariable("DayOfYear"));

            BlobProperties blobProperties = myBlob.GetProperties();

            string blobObjName = myBlob.Name.ToLower();
            int blobObjDayOfYear = blobProperties.LastModified.DayOfYear;
            int blobObjDayOfMonth = blobProperties.LastModified.Day;

            if (blobObjName.Contains("log_") && blobObjName.EndsWith("trn"))
            {
                blobIndexTagKey01Value = "LOG";
            }
            else if (blobObjName.Contains("diff_") && blobObjName.EndsWith("bak"))
            {
                blobIndexTagKey01Value = "DIFF";
            }
            else if (blobObjName.Contains("full_") && blobObjName.EndsWith("bak"))
            {
                blobIndexTagKey01Value = "FULL";

                if (blobObjDayOfMonth <= dayOfMonth)
                {
                    blobIndexTagKey02Value = "YES";
                }
                if (blobObjDayOfYear <= dayOfYear || blobObjName.Contains("backups/inactiveorgsfinal/"))
                {
                    blobIndexTagKey03Value = "YES";
                }
            }
            Dictionary<string, string> indexTags = new Dictionary<string, string>
          {
              { blobIndexTagKey01, blobIndexTagKey01Value },
              { blobIndexTagKey02, blobIndexTagKey02Value },
              { blobIndexTagKey03, blobIndexTagKey03Value}
          };
            try
            {
                var setTagResult = await myBlob.SetTagsAsync(indexTags);
                return setTagResult.Status;
            }
            catch (Exception)
            {
                throw;
            }
        }
    }
}
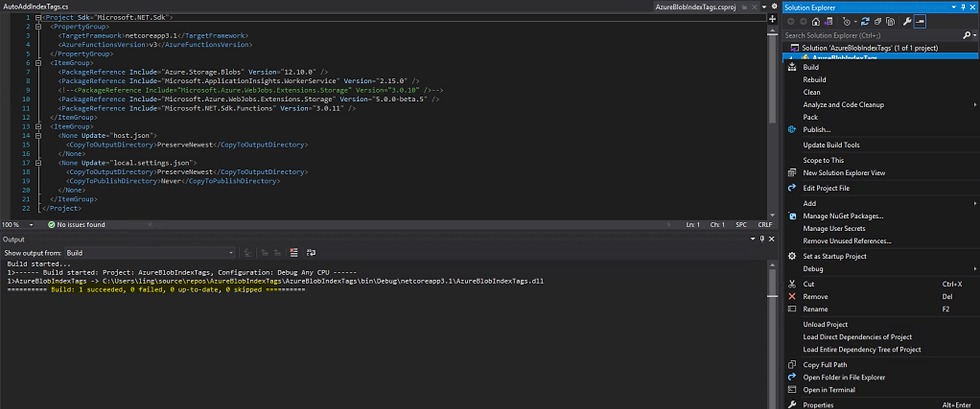
13, In Solution Explorer window, click on AzureBlobIndexTags to show the default content of the C# project configuration file AzureBlobIndexTags.csproj
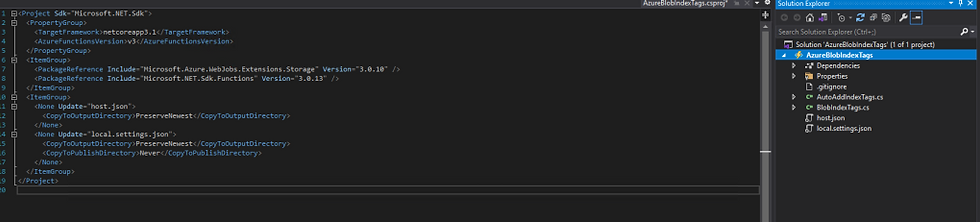
14. Copy the follow XML code block and paste it in AzureBlobIndexTags.csproj to replace all the existing lines.
<Project Sdk="Microsoft.NET.Sdk">
  <PropertyGroup>
    <TargetFramework>netcoreapp3.1</TargetFramework>
    <AzureFunctionsVersion>v3</AzureFunctionsVersion>
  </PropertyGroup>
  <ItemGroup>
    <PackageReference Include="Azure.Storage.Blobs" Version="12.10.0" />
    <PackageReference Include="Microsoft.ApplicationInsights.WorkerService" Version="2.15.0" />
    <!--<PackageReference Include="Microsoft.Azure.WebJobs.Extensions.Storage" Version="5.0.0-beta.5" />-->
    <PackageReference Include="Microsoft.Azure.WebJobs.Extensions.Storage" Version="5.0.0" />
    <PackageReference Include="Microsoft.NET.Sdk.Functions" Version="3.0.11" />
  </ItemGroup>
  <ItemGroup>
    <None Update="host.json">
      <CopyToOutputDirectory>PreserveNewest</CopyToOutputDirectory>
    </None>
    <None Update="local.settings.json">
      <CopyToOutputDirectory>PreserveNewest</CopyToOutputDirectory>
      <CopyToPublishDirectory>Never</CopyToPublishDirectory>
    </None>
  </ItemGroup>
</Project>
Update (12/03/2021) : Microsoft.Azure.WebJobs.Extensions.Storage V5.0.0 is now available, I would recommend to use this version instead of the beta version I used for my project. For details: link
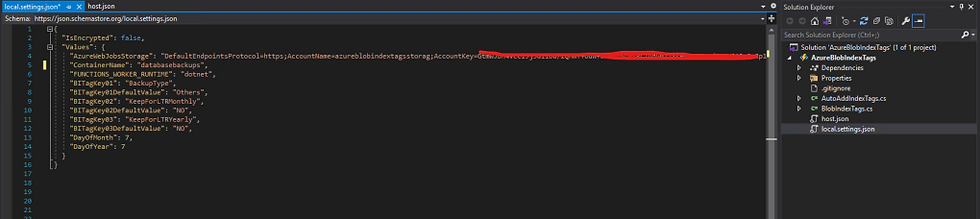
15. In Solution Explorer window, click on local.settings.json to show its default content. Copy and save the value of AzureWebJobsStorage. This value will be used in the next step

16. Copy and paste the follow JSON code block to overwrite everything in local.settings.json. Then use the saved value to replace the value of AzureWebJobsStorage
{
  "IsEncrypted": false,
  "Values": {
    "AzureWebJobsStorage": "DefaultEndpointsProtocol=https;AccountName=*********;AccountKey=**************************************************************************;EndpointSuffix=core.windows.net",
    "ContainerName": "databasebackups",
    "FUNCTIONS_WORKER_RUNTIME": "dotnet",
    "BITagKey01": "BackupType",
    "BITagKey01DefaultValue": "Others",
    "BITagKey02": "KeepForLTRMonthly",
    "BITagKey02DefaultValue": "NO",
    "BITagKey03": "KeepForLTRYearly",
    "BITagKey03DefaultValue": "NO",
    "DayOfMonth": 7,
    "DayOfYear": 7
  }
}
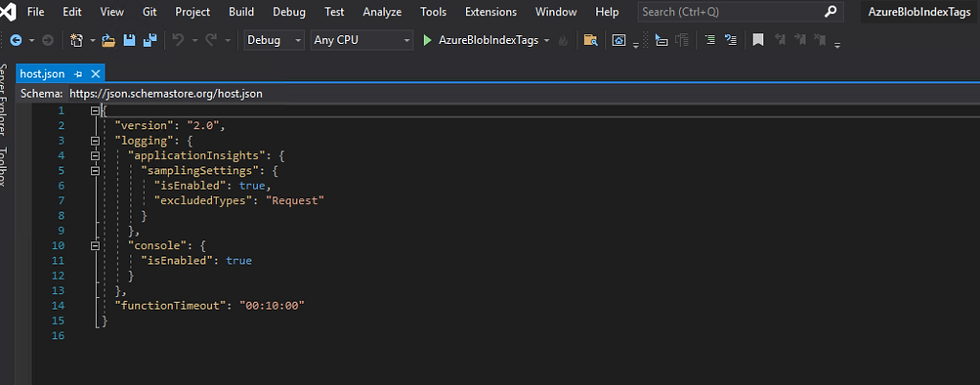
17. In Solution Explorer window, click on host.json to show its default content.

18. Copy and paste the follow JSON code block to overwrite everything in host.json.
{
  "version": "2.0",
  "logging": {
    "applicationInsights": {
      "samplingSettings": {
        "isEnabled": true,
        "excludedTypes": "Request"
      }
    },
    "console": {
      "isEnabled": true
    }
  },
  "functionTimeout": "00:10:00"
}
19. In Solution Explorer window, right click on AzureBlobIndexTags, then click Build.
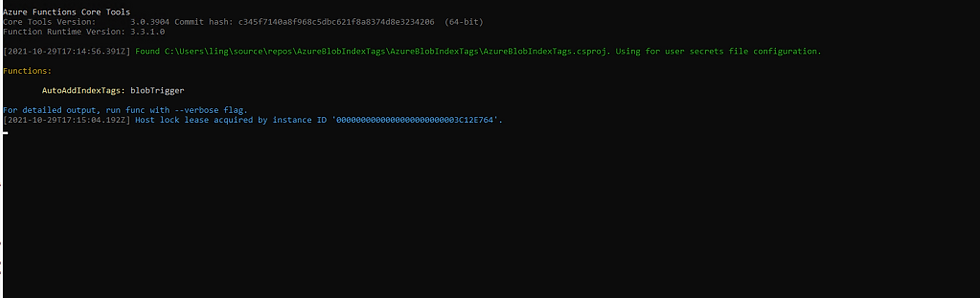
20. Run the function and switch to the new popup func.exe (Azure Function Core Tools) window

21. Login to Azure portal, navigate to the storage account azureblobindextagsstorag which you selected/created in step 5. Create a container named databasebackups in the storage account if it doesn’t exist already.
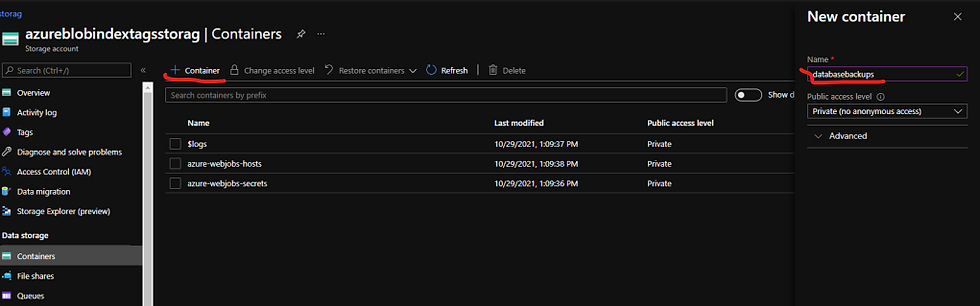
22. Step into the container databasebackups, then click the Upload button to upload a small file with the name starting with Log and ending with trn to the container. If the function works, this file will be automatically assigned three blob indexes.

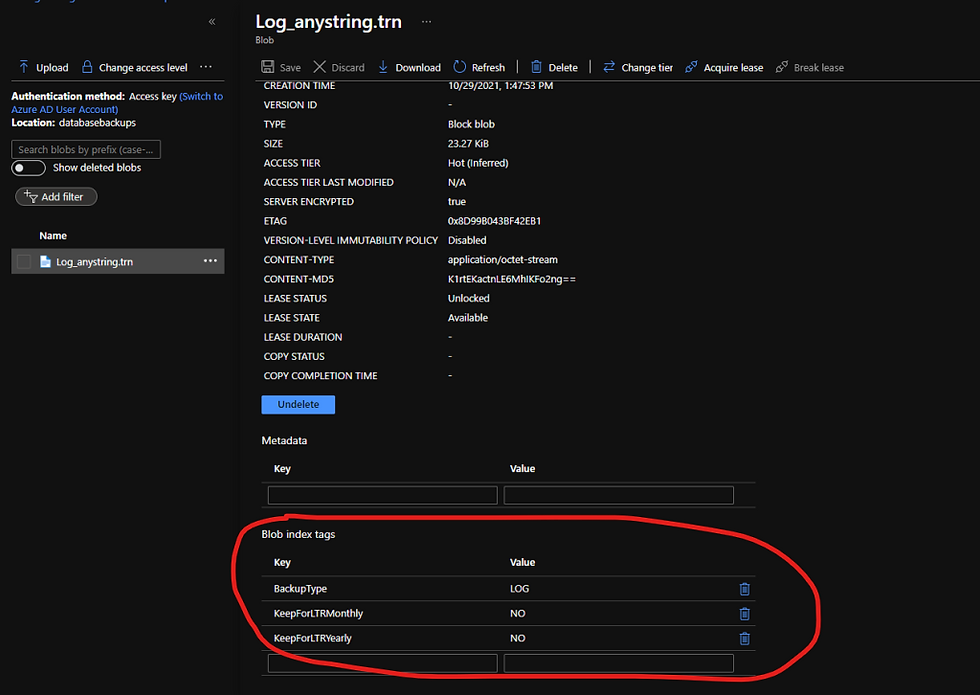
23. Click on the blob file just uploaded in the container, in Overview, scroll down to see Blob index tags. There should be three index tags showed up.
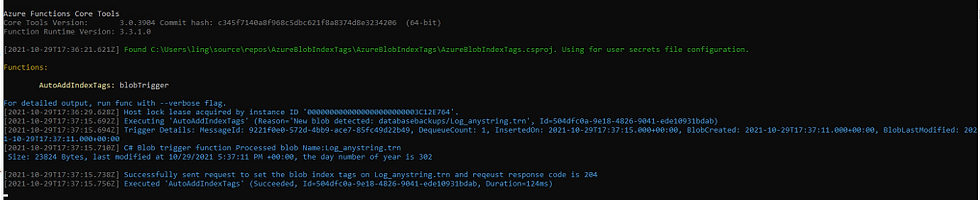
24. Back to Azure Functions Core Tools Window. Notice the function output showing the function was triggered because a new blob detected and a request was sent successfully to set the blob index tags on the new blob file.
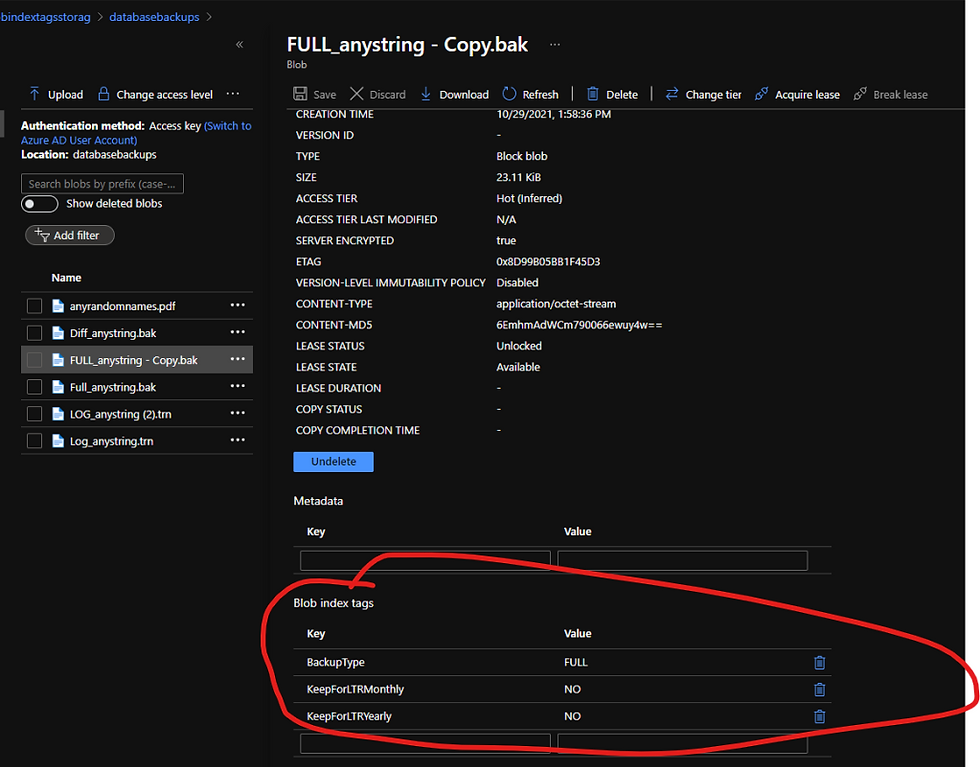
25. Upload more files with different naming conventions to the same container and verify the index tag creation.

26. Stop the function after the test and close the Azure Functions Core Tools Window
27. If the function runs successfully in the local runtime environment, publish it to Azure. In Solution Explorer window, right click on AzureBlobIndexTags, then click Publish. In popup Publish windows, select Azure, click Next.
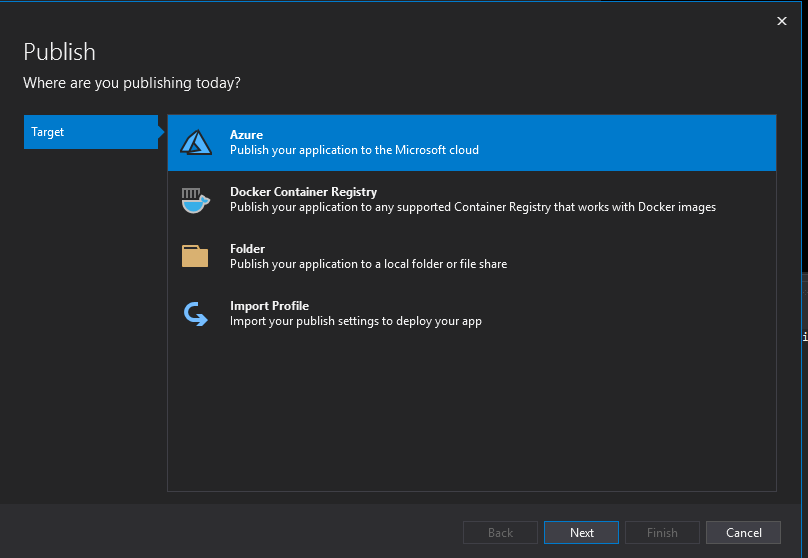
28. Select Azure Function App(Windows) as Specific target type.
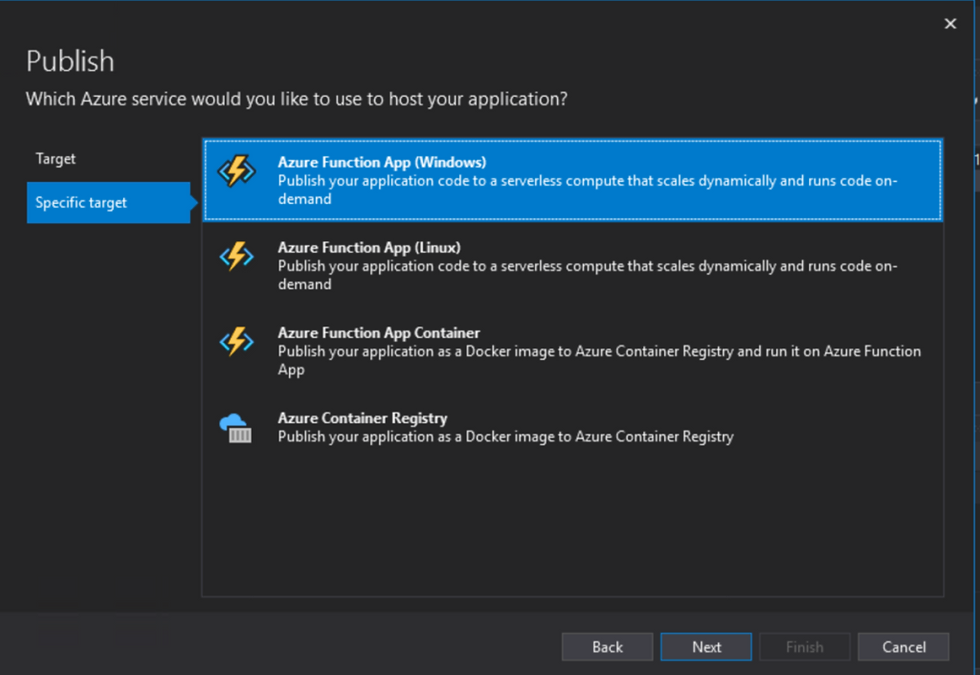
29. For Function instance, select subscription and resource group, then click on the green plus (+) button to configure a new function app.
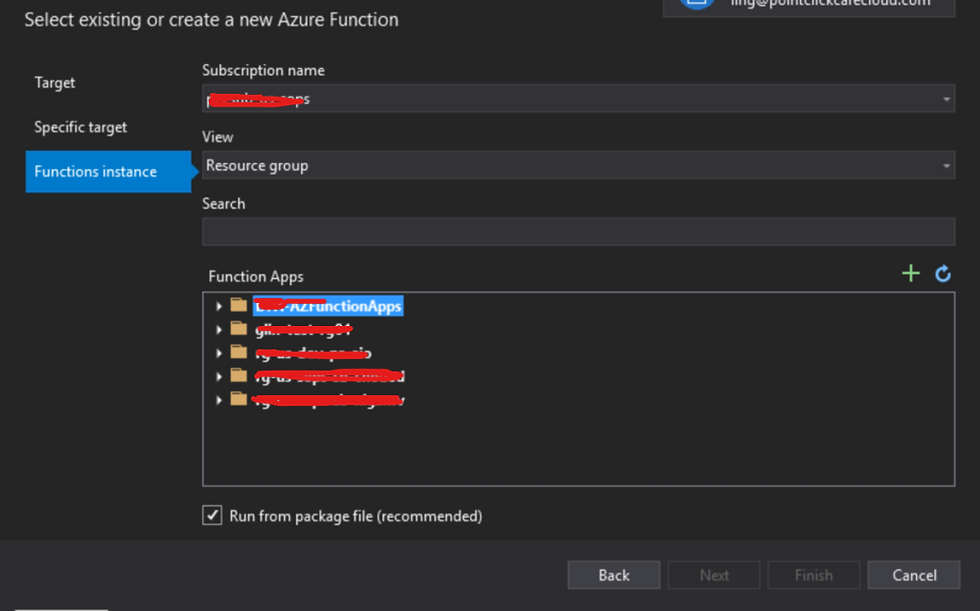
30. Configure the function app as showed below, then click on Create.
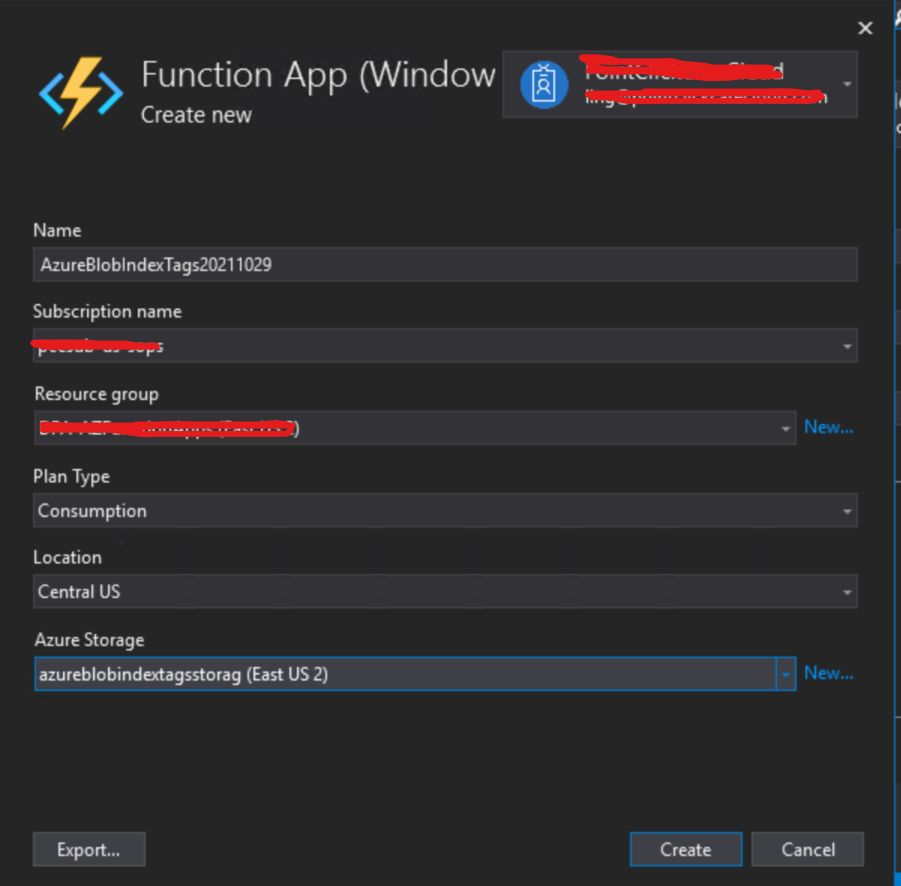
31. Back to Publish window, click Finish to close the function app configuration window, then click Publish button on AzureBlobIndexTags:Publish window. This may take a few minutes to finish.
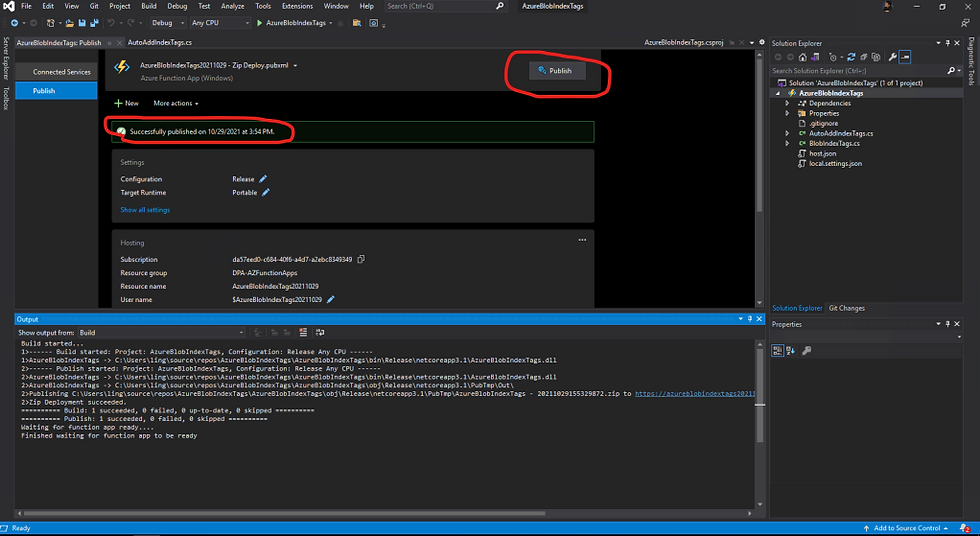
32. Back to Azure portal, find the function app AzureBlobIndexTags20211029 you just published, click Configuration in Settings, then click Advance edit.
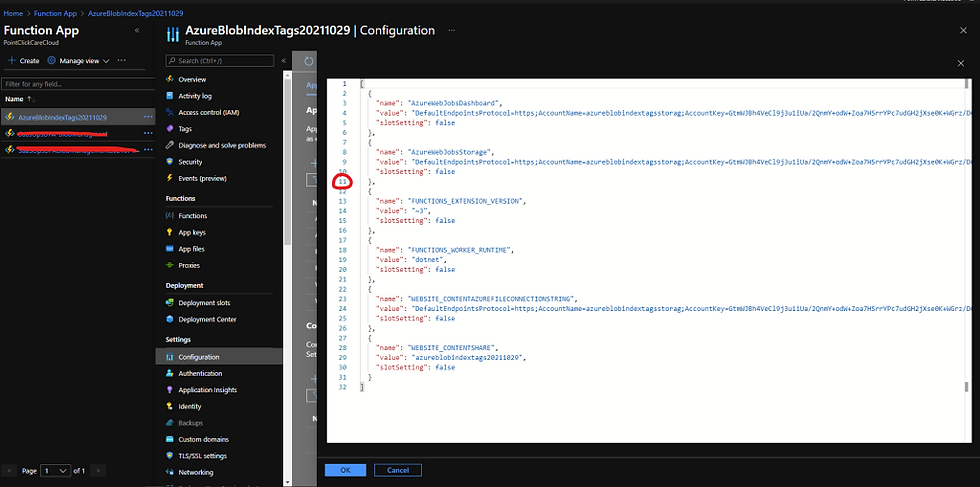
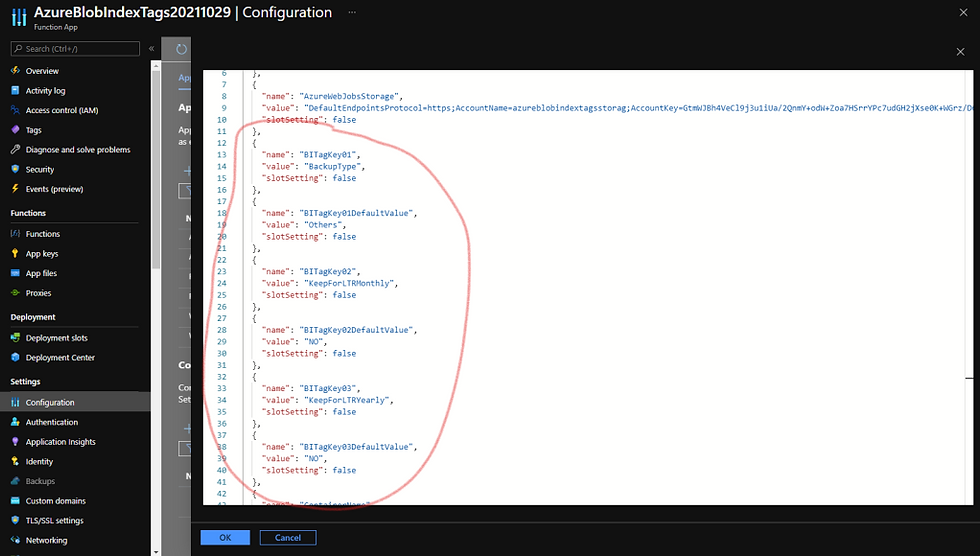
33. Copy the JSON code block blew and paste it after line number 11 in the Advance edit window.
{
    "name": "BITagKey01",
    "value": "BackupType",
    "slotSetting": false
  },
  {
    "name": "BITagKey01DefaultValue",
    "value": "Others",
    "slotSetting": false
  },
  {
    "name": "BITagKey02",
    "value": "KeepForLTRMonthly",
    "slotSetting": false
  },
  {
    "name": "BITagKey02DefaultValue",
    "value": "NO",
    "slotSetting": false
  },
  {
    "name": "BITagKey03",
    "value": "KeepForLTRYearly",
    "slotSetting": false
  },
  {
    "name": "BITagKey03DefaultValue",
    "value": "NO",
    "slotSetting": false
  },
  {
    "name": "ContainerName",
    "value": "databasebackups",
    "slotSetting": false
  },
  {
    "name": "DayOfMonth",
    "value": "7",
    "slotSetting": false
  },
  {
    "name": "DayOfYear",
    "value": "7",
    "slotSetting": false
  },
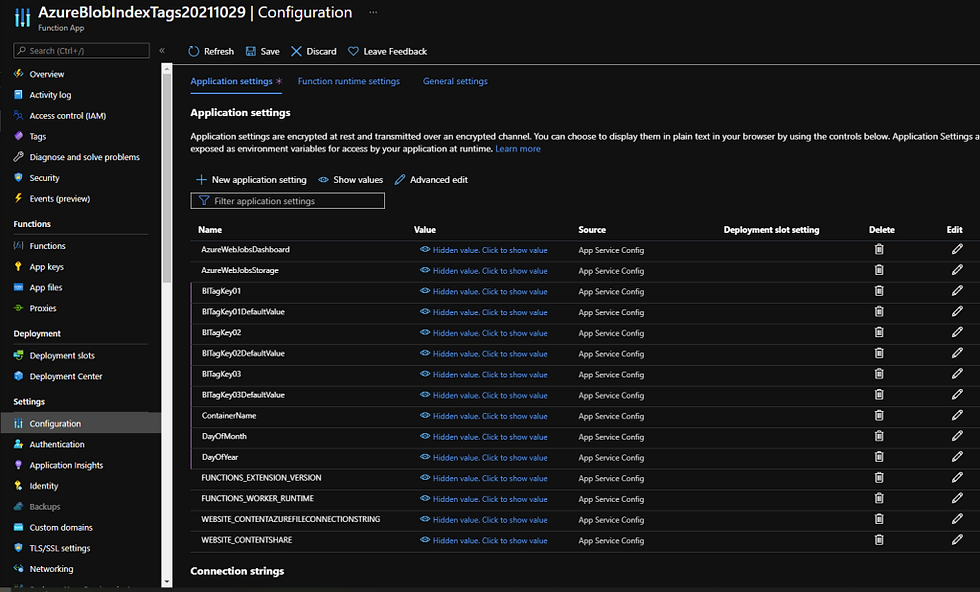
34. Click Save in AzureBlobIndexTags20211029|Configuration to save the change.
35. Click Application Insight in Settings, then click on Turn on Application Insights
36. On Application Insights page, either create new Application Insight and workspace resources in current subscription and resource group, or choose one of the existing application insights resources, then click on Apply.
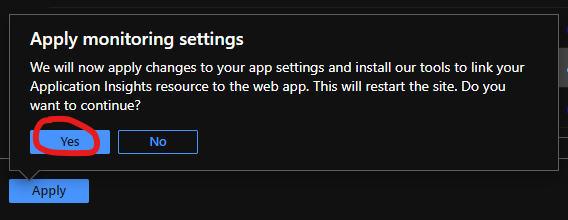
37. Click Yes on Apply monitoring settings pop up window.
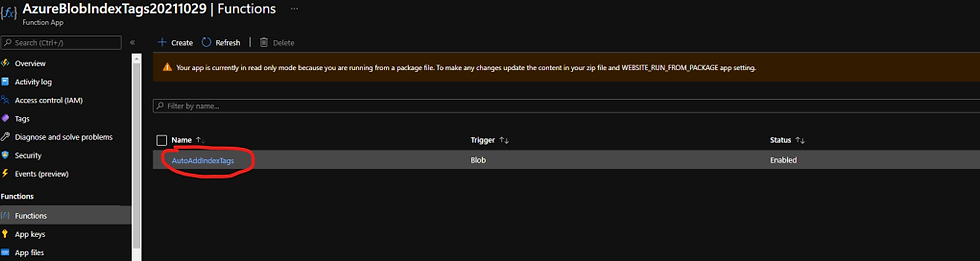
38. After Application Insights has been enabled, click Functions in Functions, click the function name AutoAddIndexTags on the right side of window.
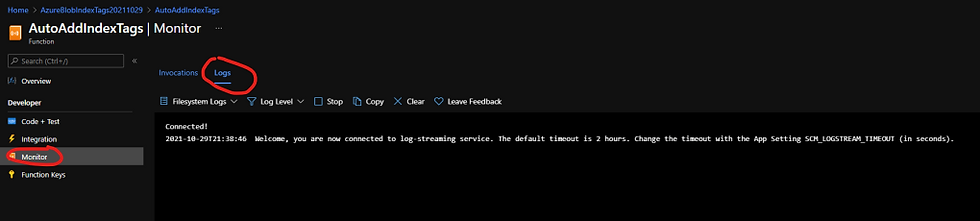
39. On Function page, click Monitor in Developer, then click Logs.
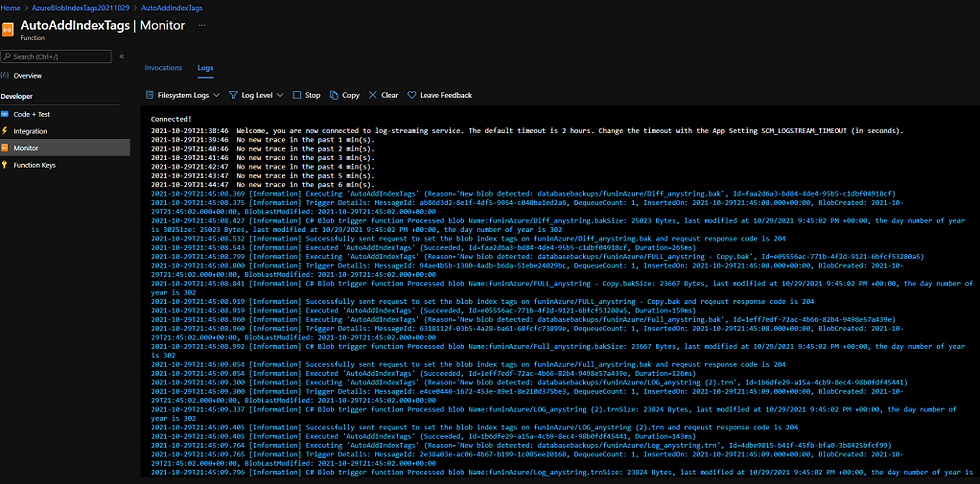
40. Repeat step 24 to upload more files with different naming conventions to the same container and verify the index tag creation
The function monitor logs shows the function was triggered multiple times by the newly uploaded files and ran successfully.
41. Click on Invocations on the same page to show the function invocation traces.
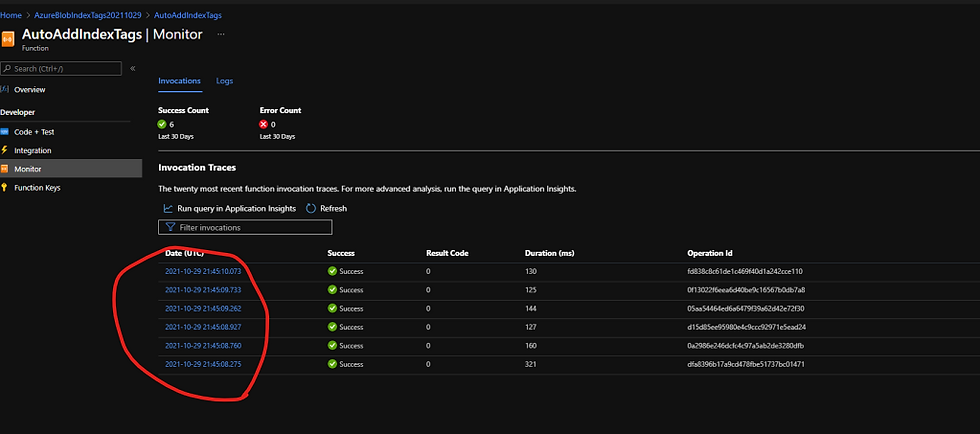
By far, we have successfully created and deployed the function to Azure
Comments